Configuring the player settings according to your need is the next step to go beyond the successful installation.
Check the steps below to configure the player settings.
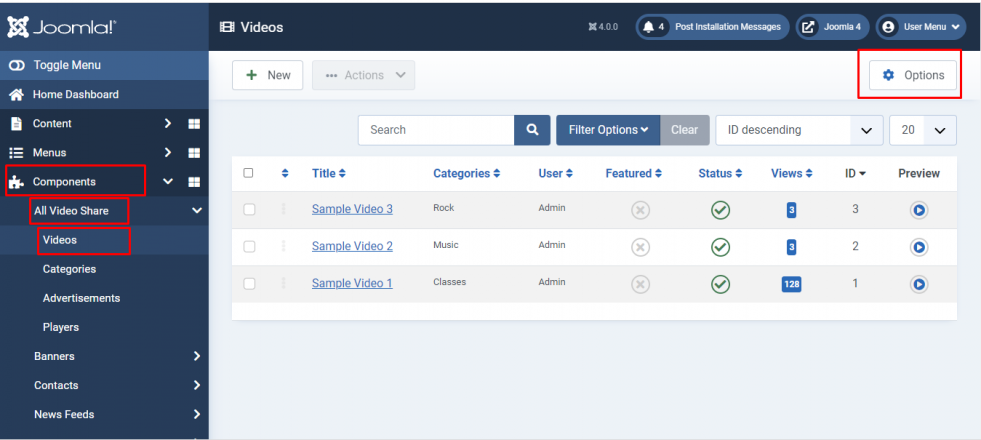
1. Login to your Joomla backend.
2. Select Components --> All Video Share --> Videos
3. Here at the right top, you will have the Options button. Please click it
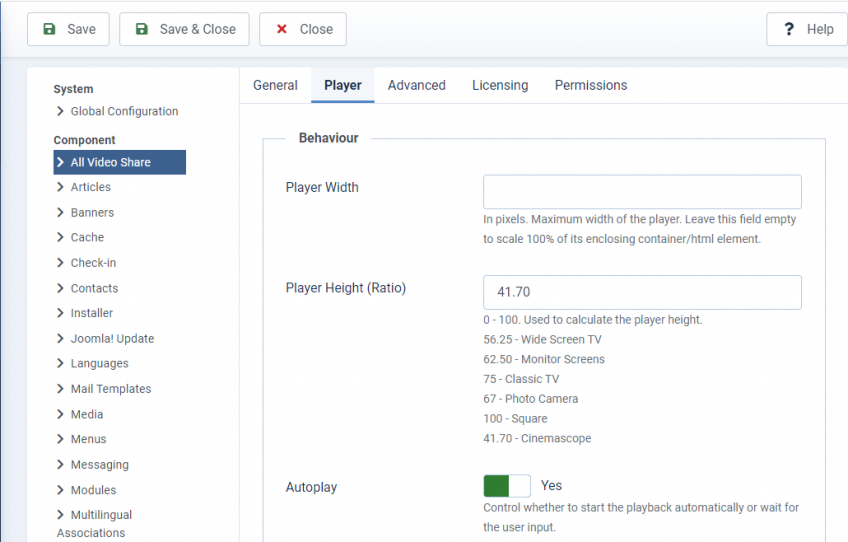
Here you can change the player settings.
Behavior
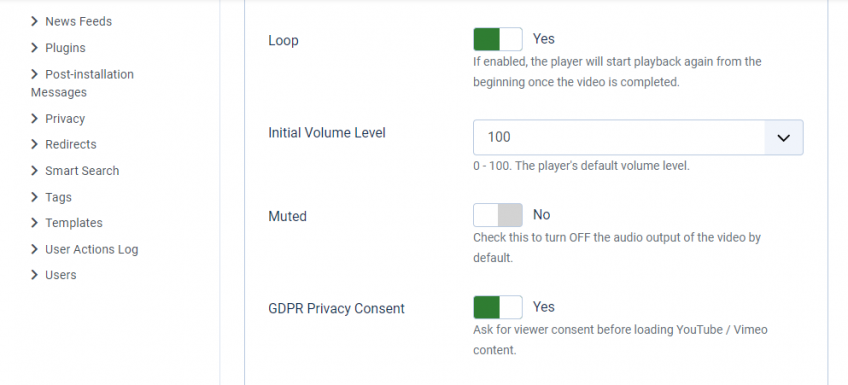
An Integer value between 0 - 100. This value is used to control the initial volume of the Video Playback.
| Properties | Description | Example |
| Player Width | Maximum width of the player. | My First Player |
| Player Height (Ratio) | Height of the Player. | 360 |
| Autoplay | Start playing the video once the video page is loaded. | No |
| Loop | Start playing the video continuously while it reaches its end. | No |
| Initial Volume Level | An Integer value between 0 - 10. This value is used to control the amount of video data (in seconds) to be captured in advance to make the playback smooth. A recommended value is 3. | 50 |
| Muted |
Check this to turn off the audio. |
No |
| GDPR Privacy Consent |
Ask for viewer consent before loading YouTube/Vimeo content. |
Yes |
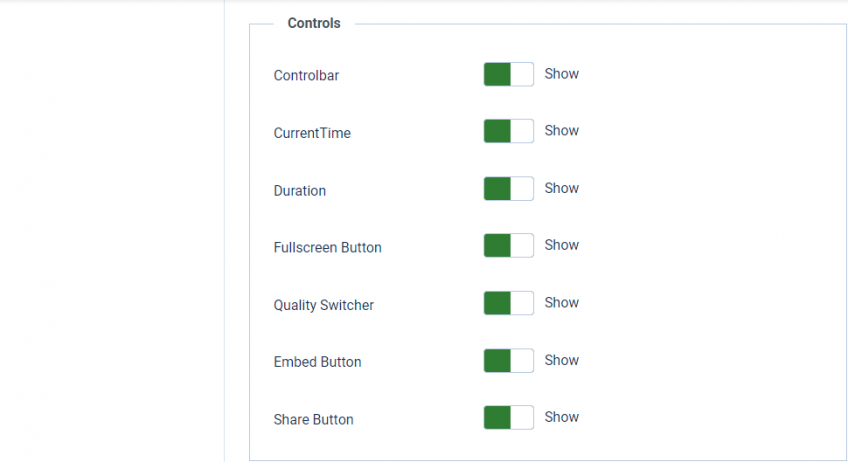
Controls
| Properties | Description | Example |
| Controlbar | Show (or) Hide the Player Control Bar. | Yes |
| CurrentTime | Show (or) Hide Timer in the Player Control Bar. | Yes |
| Duration | Show (or) Hide Duration in the Player Control Bar. | Yes |
| FullScreen Button | Show (or) Hide FullScreen Button in the Player Control Bar. | Yes |
| Quality Switcher | Show (or) Hide HD Button in the Player screen. | Yes |
| Embed Button | Show (or) Hide Embed Button in the Player screen. | Yes |
| Share Button | Show (or) Hide Share Button in the Player screen. | Yes |
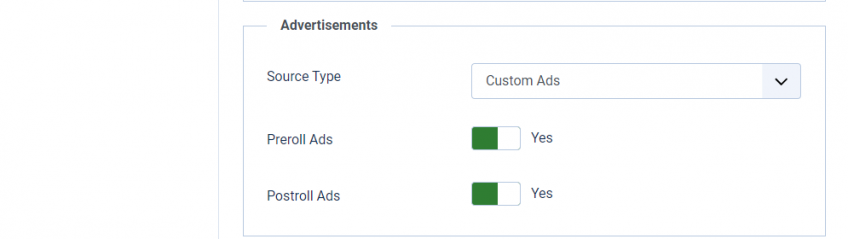
Advertisements
| Properties | Description | Example |
| Source Type | Advertisements for the player | Custom or VAST/VPAID |
| Preroll Ads | Enable or Disable advertisements to play before the video starts. | Yes |
| Postroll Ads | Enable or Disable advertisements to play after the video ends. | Yes |
| Ad Tag URL | Field to add the VAST URL | Check this page |
4. Click Save Button at the top left corner.
5. Congrats! You have successfully configured Player Settings.